Tech Stack

Frontend
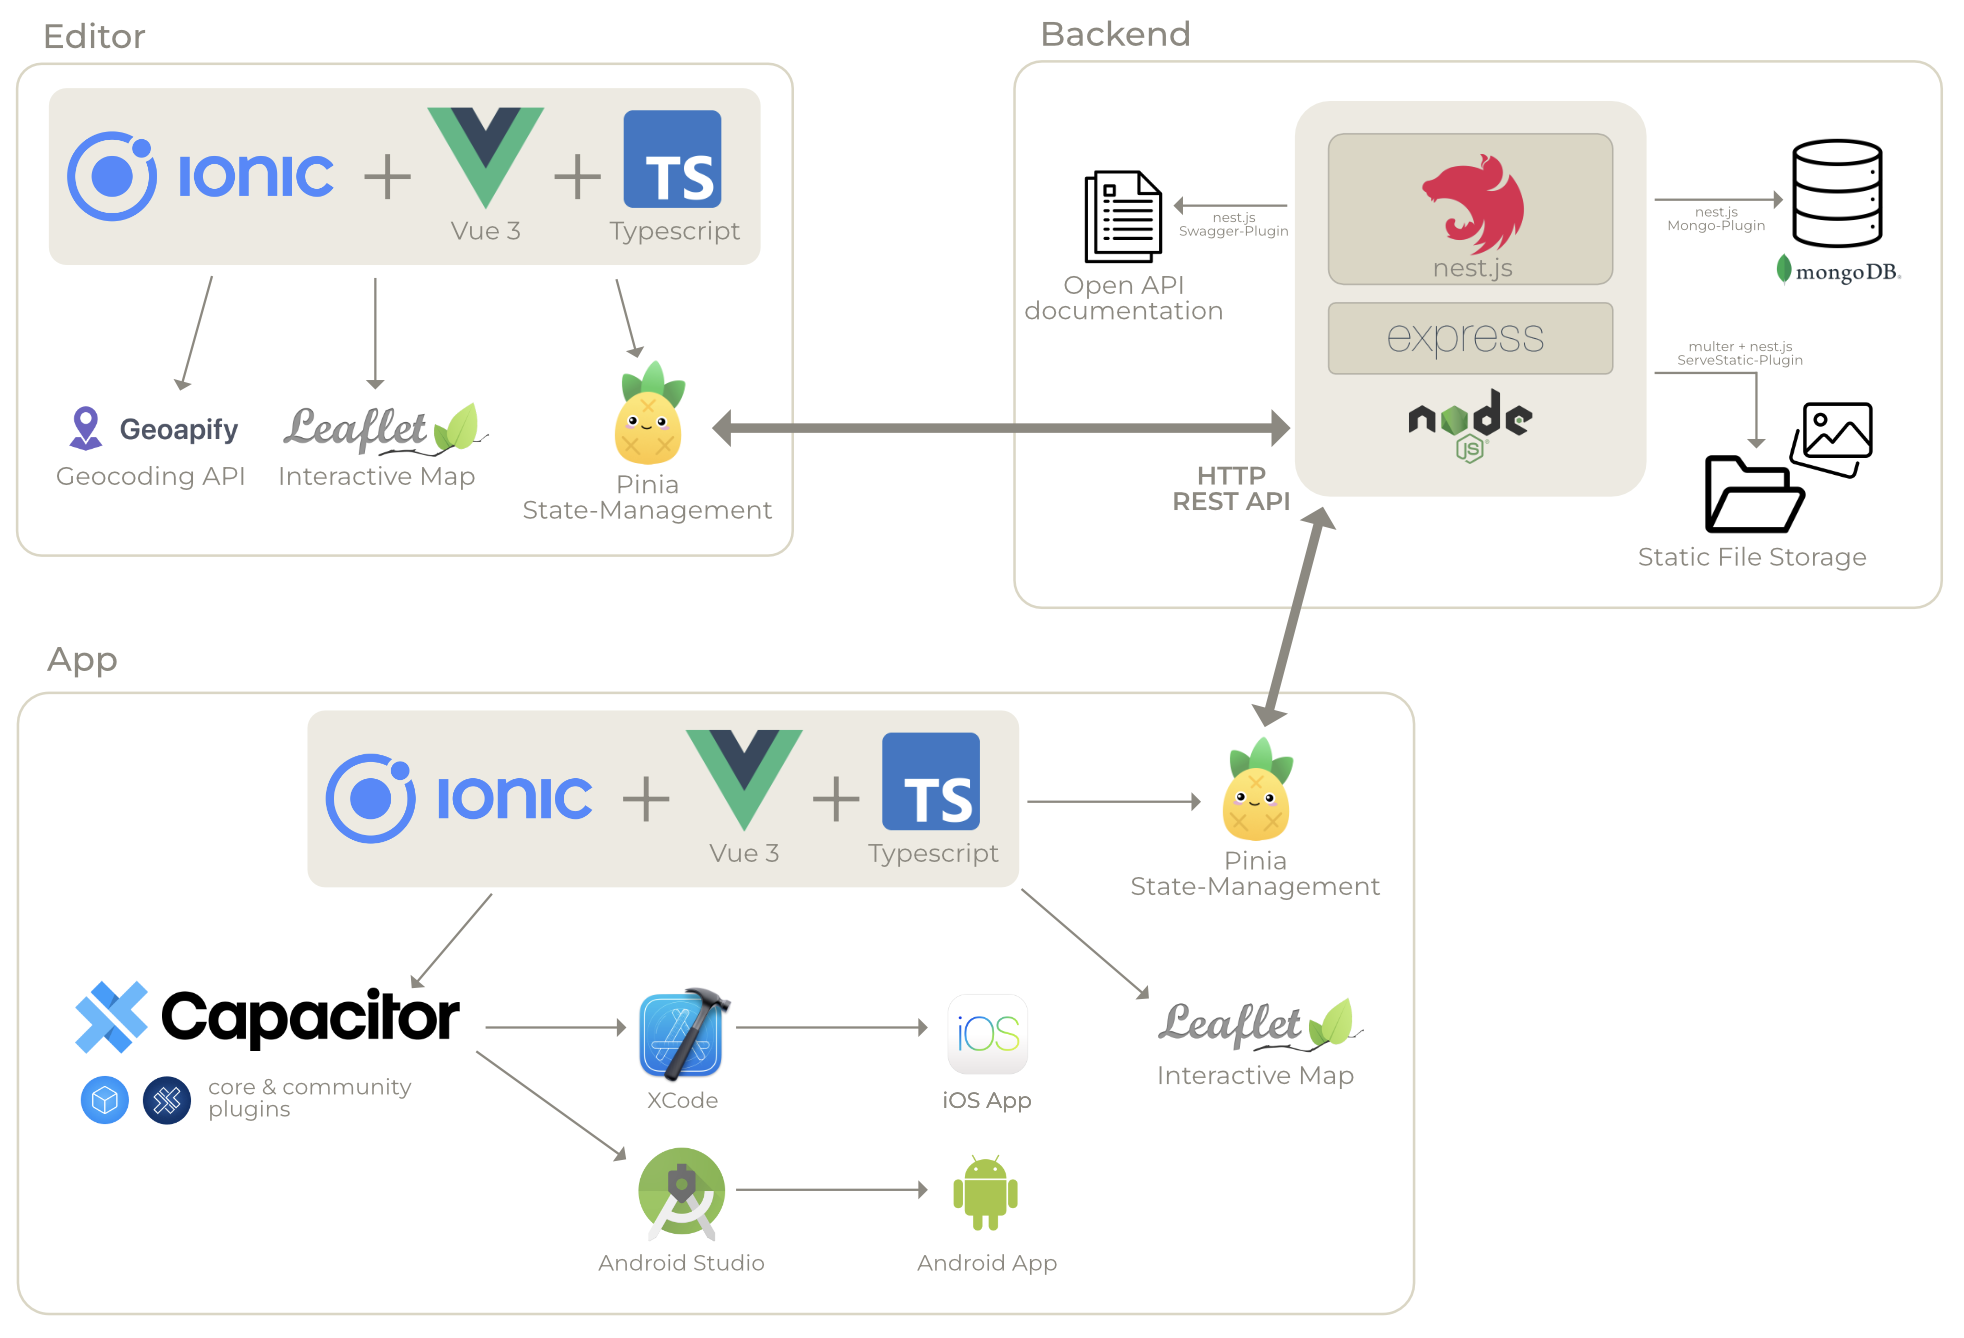
The frontend of our project consists of a mobile app and an editor. To save resources we decided to keep the used technologies of both of them as similar as possible. This way everyone was able to work at the app and the editor interchangeably.
Vue 3
Vue.js is a frontend framework for developing user interfaces. It uses declarative rendering and reactivity to update the DOM upon JavaScript state changes and has great TypeScript support. We decided to use Vue.js because all of our team members had worked with it in the past at least once. Pinia is used for state management, since it works best with the Vue.js Composition API.
Ionic & Capacitor
Ionic is an open-source UI kit for building cross-platform apps. As it is based on Web Components, any UI framework can be used in conjunction. There are many UI components available with Ionic, most of which are optimized for mobile apps but can also be used in web applictions.
In combination with Capacitor it is possible to build native apps via AndroidStudio and XCode and access native APIs. Capacitor is therefore only used for the mobile app.
Leaflet
Leaflet is an open-source JavaScript library for interactive maps. It is mobile friendly and can be extended with plugins. We used Leaflet for the editor and the app.
Backend
At its core, our backend should just be a simple CRUD API for the resources needed by our app and editor. To make the implementation of the API straightforward while also providing type-safety with Typescript, we decided to use Nest.js as our backend framework with MongoDB and Nest.js’ mongoose package for our database.
- an express-based Node.js framwork for building efficient server-side applications - provides first-class Typescript and OpenAPI support, giving us the ability to generate our API documentation from Typescript annotations and JSDoc/TSDoc comments
- a document-oriented NoSQL database which we used with Nest.js’ mongoose package
- the JavaScript runtime for our backend
- a specification for API description files - used by us for documenting our API to improve collaboration between frontend and backend teams
CI/CD
Docker
To make deploying our project’s components as easy as possible while also (mostly) eliminating the “It works on my machine” type of errors, we decided to build Docker images for our backend and our editor. This gave us the possibility to develop, test and deploy most of our project in a uniform environment across multiple devices and it made our deployment process as simple as uploading a Docker compose file to our deployment server and running docker-compose up to spin up all the containers required for our application stack.
Docker on M1 Macs
As mentioned above, using Docker eliminates most errors stemming from different machine setups, but not all of them. Since Apple introduced the new aarm64 CPU architecture for their new M1 Macs, there are some difficulties when building images for development on MacBooks in some cases, e.g. when npm packages don’t contain binaries for the aarch64 architecture. To eliminate all of these issues, we needed to include some additional build steps in our Dockerfiles for Docker to build the missing binaries itself.
Deployment on our HTW project server and AWS
In the beginning of the project we requested a project server from HTW for the deployment of our front- and backend. What we did not know at that time was that the IMI-GitLab instance we used as our VCS platform does not provide any GitLab runners (servers that run jobs from CI/CD pipelines), so we had to set up our own runner for our repository. Since the runner used almost all of our project server’s resources, we decided to deploy our project on AWS instead. For that we created an EC2 instance of the t2.micro tier and configured our CI/CD pipeline to deploy the built Docker images onto this instance using our Docker Compose file and Docker Hub as our container registry.
Tools
GitLab
Our repository was located in GitLab. We also used features like issues, labels, boards and milestones to manage and coordinate our project which help us in our daily workflow.
Miro
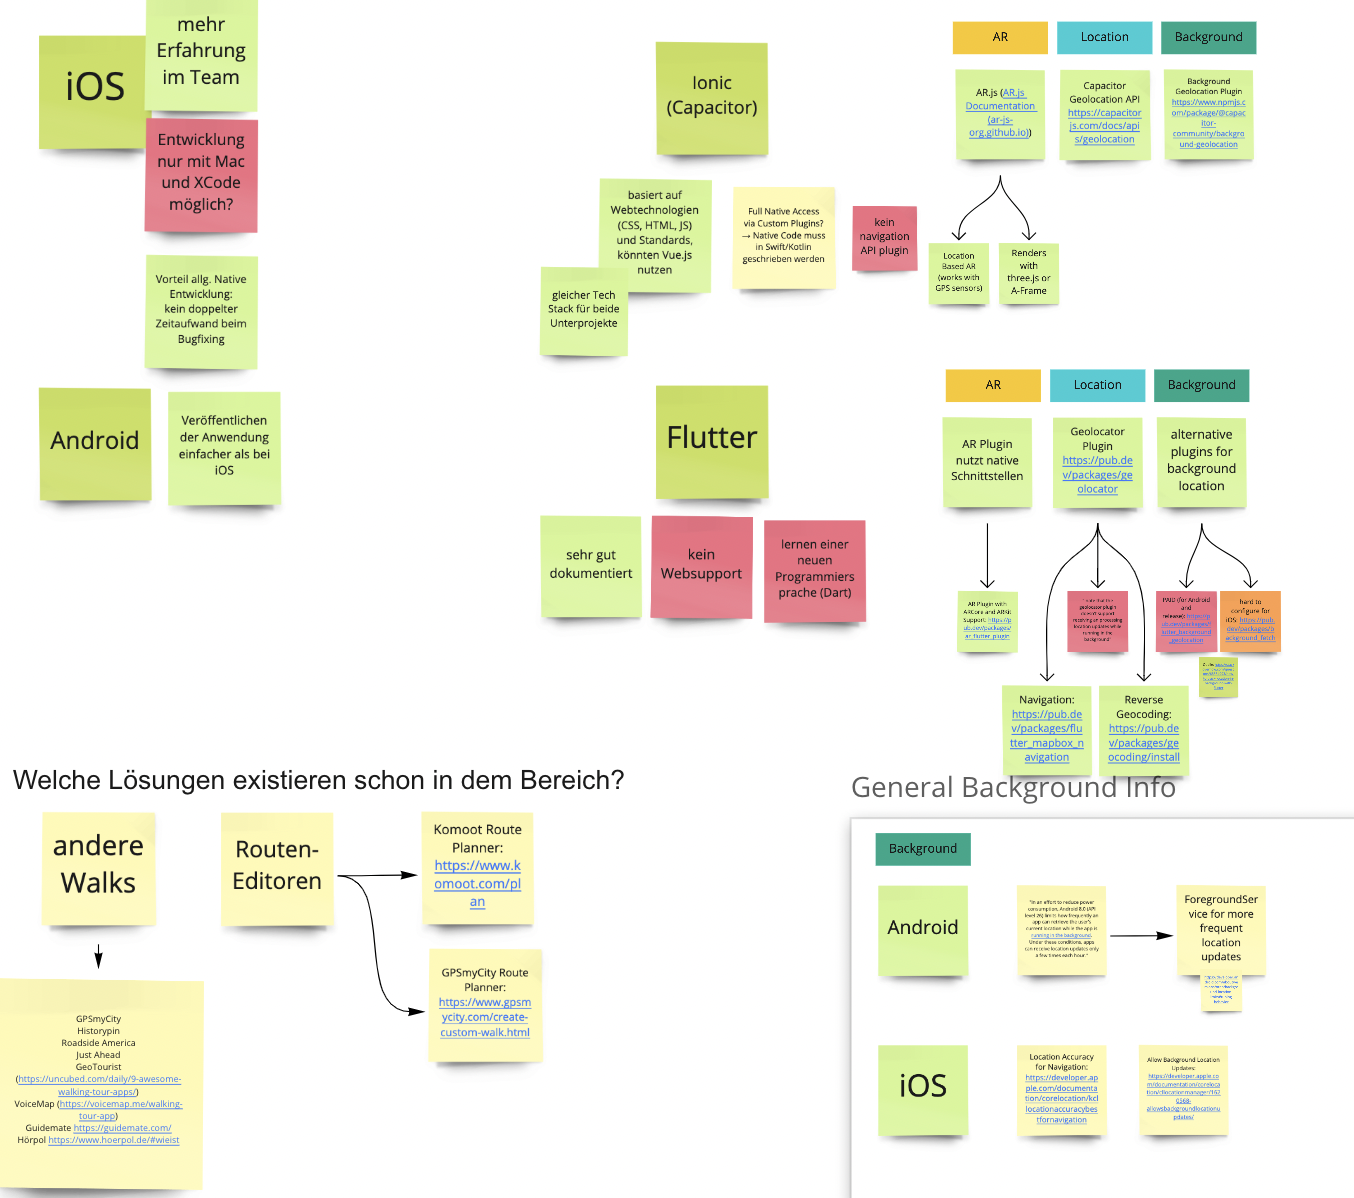
We used the online whiteboard application Miro for brainstorming, debating, and creating thoughts, especially in the early stages of our project.


AdobeXD
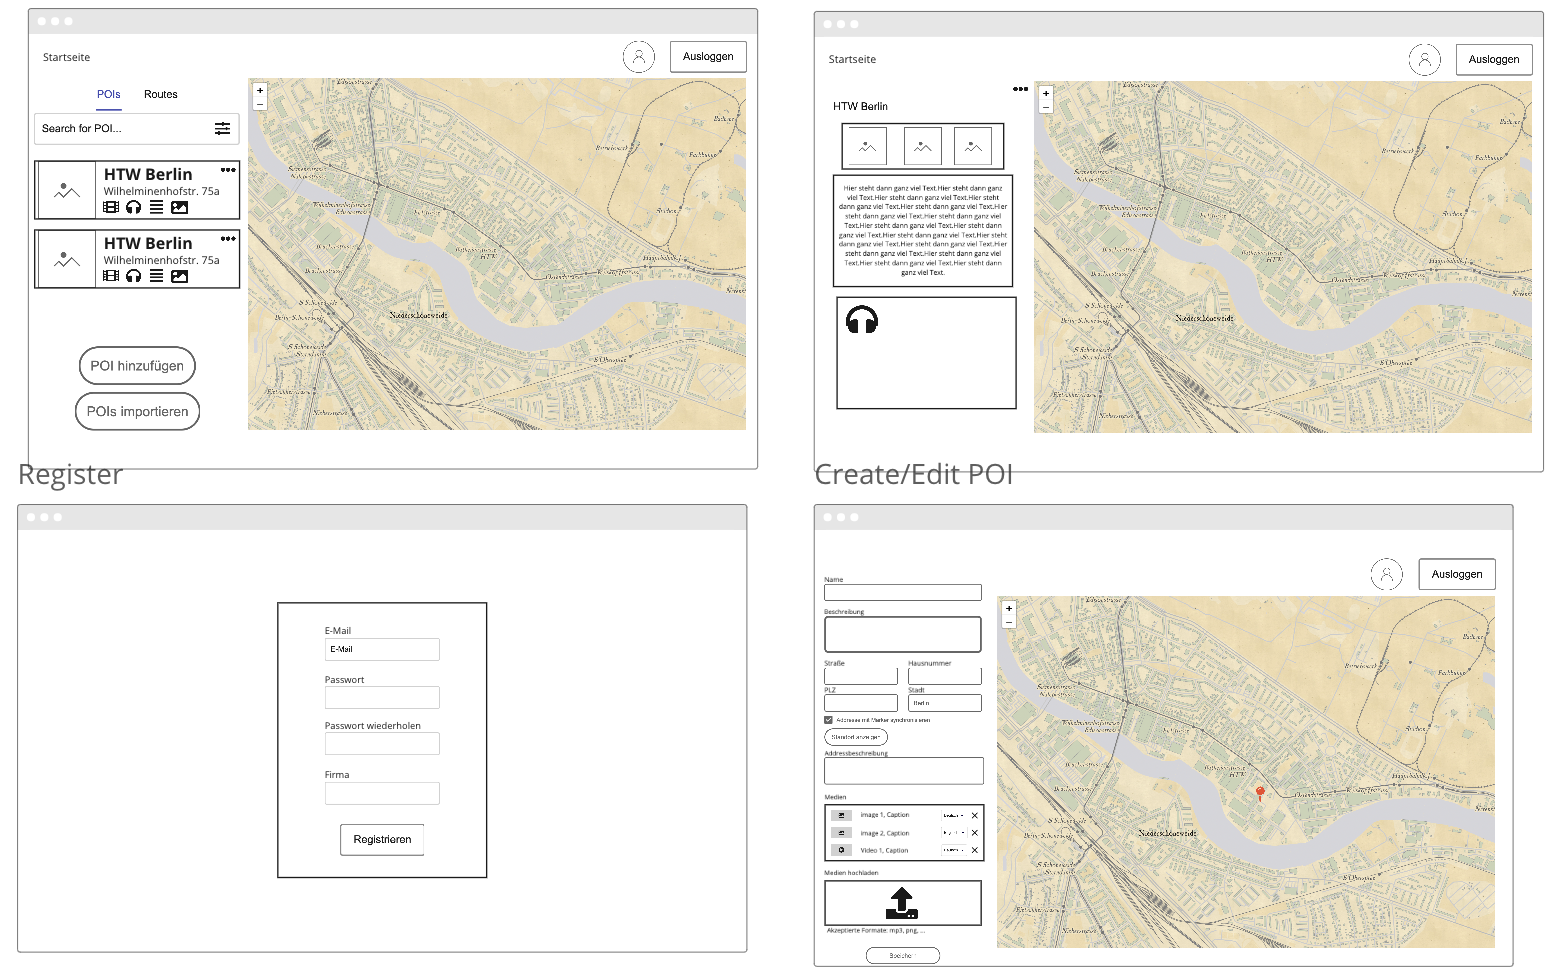
To create a visual design for the app, we used AdobeXD. It’s prototyping feature was used to create transitions between the different pages in order to use it as a high-fidelity prototype.
Discord
Our main communication tool was Discord, where we had a project server in which we could keep us up-to-date in between our weekly meet ups.